Monday, October 17, 2011

Where did September go??

...oops....I guess I missed September.  I think I must have blinked twice, and it was gone.  I don't know how, when you think time can't possibly fly any faster, it manages to do so.  But it does, and it has, and here we are again.

I've not made a whole lot of progress over the past month; although I did complete a silk piece on the table loom.  I've loved working with this little loom since I bought it from John Low of Woolhouse Tools a couple of years ago.  I've loved working with it so much that I've committed to purchasing a countermarche loom from him as well.  Since I've only woven with jack looms (and this table loom), it is what I consider to be my first 'real' loom.  It will also be what I consider my 'life loom'...or all that I hope it to be for the rest of my days...and it is the Gertrude, which will have 16 harnesses, double back beam and the extension and harnesses for 51 drawloom pattern shafts.  I'm hoping to have enough paid on it to have it here at about the time that my second child, my daughter, leaves for college next fall.   ...did you catch the gasping sobs that follow the thought of my daughter leaving for college next fall?  Just how else can you combat that but with the distraction of putting together a monster of a loom?  That's my plan.  I'm sticking with it....

Sometimes, I have to pinch myself and give a good think to whether I've really got this in the works.  Susan Harvey (now would be the time to learn how to insert the link to her blog!!) is not only an amazing weaver, but a very kind woman, and sent me a gazillion photos of her Gertrude (Emmatrude) to admire until that day arrives that I get to tie up my own 640 texsolve cords.  If I can produce half the quality that Susan produces on her Woolhouse, I willl be a happy girl!

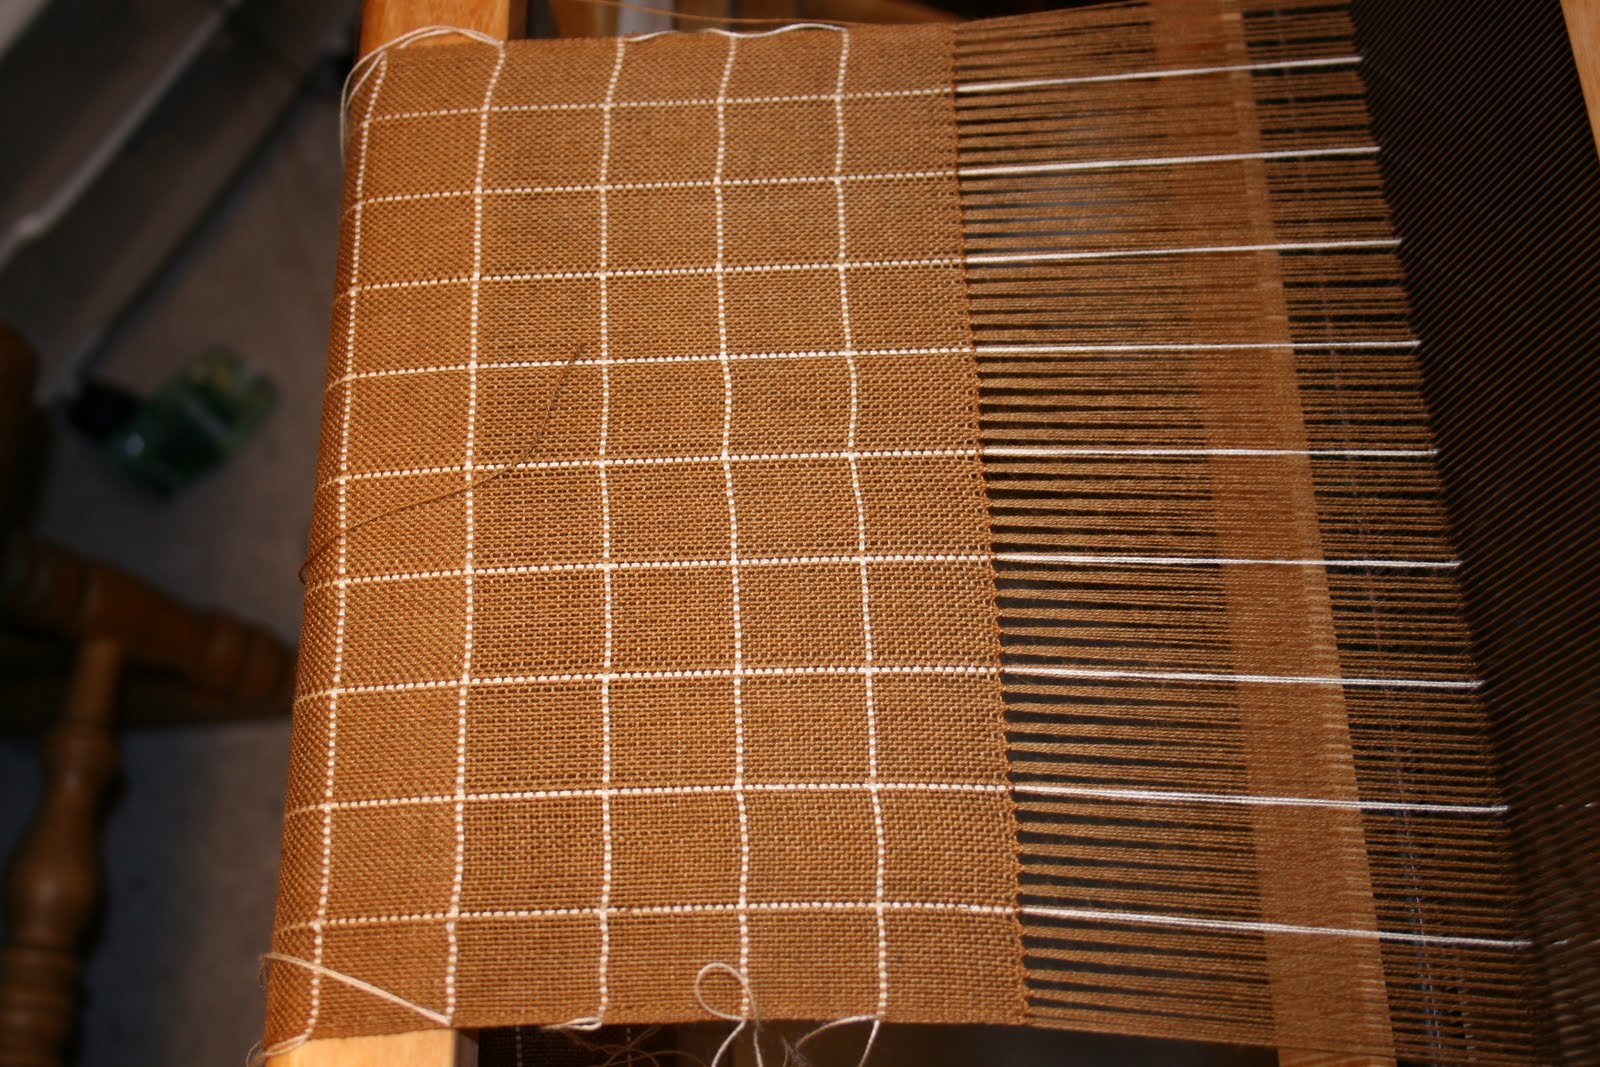
So until then, I still have plenty of work to accomplish with my Baby Wolf and this fabulous table loom.  This is the first time that I've actually put all 12 of the harnesses to work.  Because I enjoyed the process of weaving an 8H gebrochene a few months ago, I picked a 12 harness version from Handweaving.net.  I actually did a lot of UNweaving, along with the weaving; but it kind of matched a funk that I've been in, so not a big deal to go backward and forward like that. 


You can see one of the errors in the photo on the left....I have to admit that on one occasion, I unwove about 4 inches to get to an error like this, only to realize that there was yet another one about 3 inches prior to that.  So unweave I did, because I can't just cut silk and throw it away.  I had to adjust my process to take more time when moving the temple and using the drawdown rather than a handwritten progression to keep the pattern more in focus as I worked through the treadling.  That made the difference and avoided additional errors.


I love weaving with the table loom because it slows everything down to a place where the structure of the weaving is allowed to sink in on a practical, hands-on level.  John developed this wonderful gadget (called a 'Which One') that allows you to have a physical guide for each 'treadling' of your progression.  The white clips correspond to which harness needs to be raised, and each column aligns with the levers for the harnesses.  I'm not sure I would enjoy weaving on a table loom as much without this aid.  Rather than move the little bars as I progress (the peg in the middle of the bar allows you to lift it out of thte opening at the bottom of the tower and slip it back in at the top), I just label each and use them as a visual guide.  In many patterns, there are reversals that make the  moving of the bars more of a hassle than a help, so I find to just have the guide in front of me works quite well.

Another advantage of the table loom is the amount of waste that can be avoided, particularly with a fiber that is especially costly and painful to waste.  At $60-ish per half pound cone, I hate to waste silk.  This silk is 20/2, which I wanted to use to get acquainted with weaving with silk.  What a treat to work with, and I now look forward to moving on to the finer gauge.  I think the biggest challenge with moving on to a smaller grist is having enough heddles....so more heddles may be in order before I can move on to 60/2 and finer.

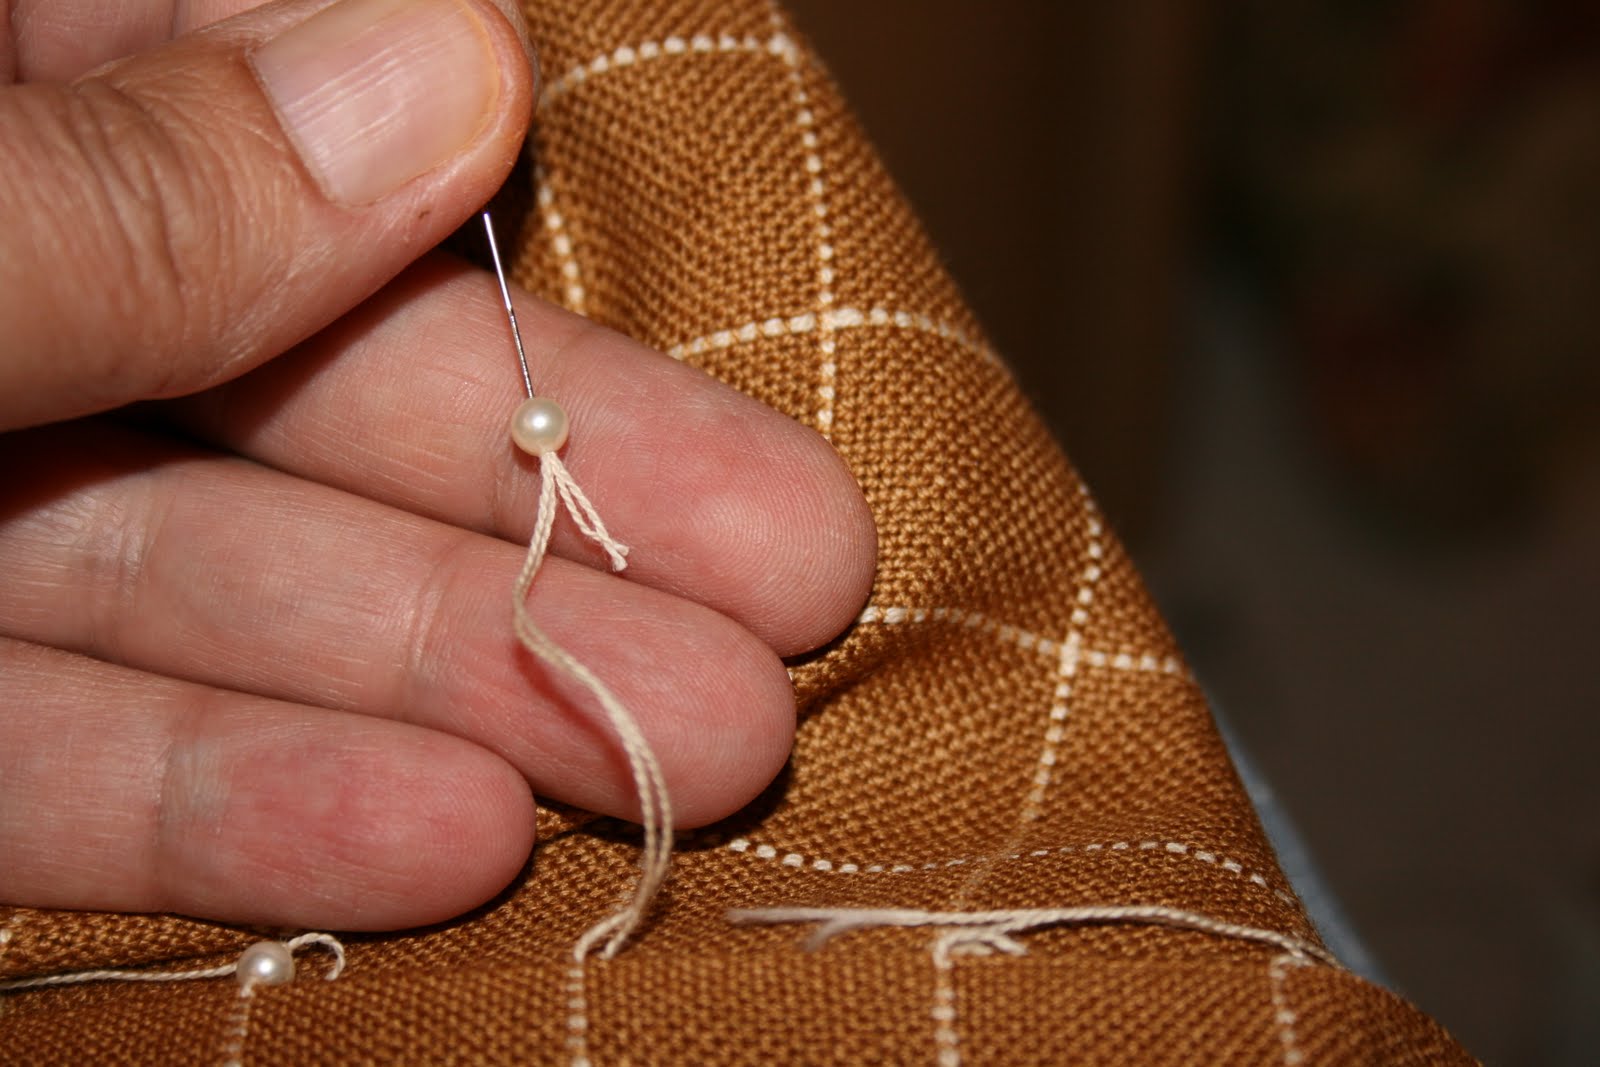
This gebrochene is # 55861 in the Handweaving.net library.  It was sett at 28 epi with 20/2 silk, woven at 28 ppi.  At 61 ends per pattern repeat, and 7 repeats, I ended up with a stole of about 15" width, woven to  72", excluding the 5" fringes on each end.  It was hemstitched at 12 ends per section, divided into and twisted as three four-end plys.  The center section was beaded prior to twisting; and I'm quite happy with the end result.


Next up on the Baby Wolf is a run of overshot runners.  I'm trying back-to-front warping for a change, so all sorts of adventure is happening with that.  I'll share photos for a 'later in October' post....

I thank you for visiting and sharing my weaving space with me!!  Happy and healthy weaving to you all!

...until next time.....

Linda

Wednesday, August 24, 2011

There is satisfaction....


...in watching the beam collect its layers of woven cloth.  This is an 11-yard warp of block twill towels.  The cotton was gifted to me by a dear friend who was 'cleaning out', so called for the use all of her colors for this collection of towels.  I used the inspiration (again!) of Sharon Alderman's 'Mastering Weave Structures' in putting together a five-color block twill.  Half of the towels were woven in broken twill, half were woven straight twill.  I *love* these towels, which were woven 24" x 34"; finished at 18" x 30"...although, I think with a bit more stretching and tugging with the pressing, they would manage another inch or two each way.

 The tabbies were made on the inkle loom, which I asked my husband to build specifically so I could make towels with these beautiful little hanging tabs.  I've always loved how nice the scandinavian towels look with their coordinating hangars.  He came through with flying colors, and now I can make coordinated hanging tags.

The sett for these was 24 epi / 24 ppi, so the hemming was quite straightforward with 2.5 block rows per hem, folded and pressed on the block lines. 


As much as I was aiming for an easy, relaxing weave, I was destined to make use of the time with several worthwhile lessons...

1:  Even though you're SURE you've been careful about not reversing one of the warp chains, it's a good idea to look again.   I reversed my second chain, which made this warp symmetrically wrong, which made me symmetrically very frustrated!  Jan, my weaving friend in New Mexico made the *excellent* suggestion that I somehow mark (i.e., with a tied string) the start of each sequence when splitting warp chains.  This way, there would be an extra reminder that even though my brain is CONVINCED that I've checked and re-checked correctly, I won't be beating my head on the wall the next day trying to wonder whether my sanity is quite THAT tenuous!

2:  Any time I become mesmerized by the odd, inexplicable rippling of the cotton on the end-feed shuttle, I should quickly see whether an end has found its way into the mechanics of the nearby fan.  I know now that the fan can UNwind cotton from a pirn at least 6 times faster than I can re-wind it.

3:  Any notion of working with skeined cotton in the future should be immediately squelched!  I now know that I would rather stick needles in my eyes than work with skeined cotton again. 

4:  Having said that, unless I want to buy 5 full cones of color to work up these fun towels again, only WITHOUT the reversal of the chain, I may just have to settle for the more affordable alternative of buying skeined cotton.  ...isn't this like childbirth?  If I give it enough time inbetween, my mind will play tricks on me and delude me into thinking that I could do that again without full recall of the pain involved the first time around?.....hmmm...we'll see.

But it was a fun weave!  I'm quite happy with these towels, in spite of my dumb error!  And I will definitely have to do these again.

Thanks for visiting!!! 

Until next time.......


Sunday, July 24, 2011

'Our Scarf'......

I'm going to try this again using a blog format that is much more user-friendly than my last attempt.  Being that I'm not very patient with computers, nor much inclined to figure out why something does or does not work, I'm hoping this will be a more successful 'go' at it.

I'll christen this blog with a project that I started in January of this year, inspired by the gorgeous samples in Sharon Alderman's 'Mastering Weave Structures'.  I had the 12H Woolhouse Carolyn available for a new warp, and one of my favorite fibers to weave with is Infinity (Soy) Silk.  I envisioned a plain weave scarf with doubled ends at each inch repeat in a contrasting color and mirrored in the weft.  Because I didn't want the unsightly and glaring woven in ends of the doubled contrasting weft shots, I sent this photo to my dear friend and fellow weaver, Ellen, and said:  'Ellen!  Heaven help me!  But I think I'm going to have to do something other than weave in these ends....maybe some kind of small bead'?  Ellen most enthusiastically wrote back:  'Oh yes!!!  Can't you just see pearls at those ends'?

......that sounded perfect to me, and from that point on, as I worked my way through 5 needle threaders and several packs of #24 tapestry needles, I would occasionally send a note to Ellen about 'what a great idea she had!!!' and maybe a little grumbling about the amount of time it was taking to accomplish this task.  At 70 inches excluding fringes, 140 beads were affixed to each cream intersection.  Because beading needles were not only too long for me to comfortably work with (I cut my teeth on quilting betweens many years ago) as well as too narrow in the eye to accomodate the doubled weft threads, I found #24 tapestry needles to be the magic combination of size of eye and small enough needle to move through the bead.

I went through so many needles (the eye would eventually fall apart after maybe 6 or 7 bead threadings) and threaders (I think they're just simply not made very well) because of the sheer number of threadings required for each bead.  I've tried to capture the process; I hope I can get it all in order:


First, I would clip / trim the ends of each doubled weft shot...


..next thread both onto the needle, followed by stringing a single pearl (Swarovski pearl beads come in a variety of beautiful colors!!)

In order to ensure that the bead did not later pull off, I tied two square knots after making sure that the bead was not pulling into the woven fabric....


...at that point, each of the two threads were re-threaded and brought back through the bead.....

...catching just a hair of the fabric itself....

..and just to make myself feel better, I sewed it through the scarf one way,


...then back the other way, after which it was clipped close to the base of the bead.

..second thread was done likewise.....


..et voila!


I have to say that although it took as many hours to bead this scarf as it did to set up and weave (a total of about 35 hours altogether), I *so* love how it turned out!  And truth be known, I found all of that time spent beading to be very relaxing and enjoyable.  So I will certainly be doing this again, given how much I love the finished product.

When it then came to fringing, I tried a few fringes using the hemstitched bouts of 6 threads; however, it was just too anemic a fringe for my liking.  I borrowed from the inspiration of Susan Harvey's gorgeous finishings and decided to combine two hemstitched bouts per twist.  While I prefer a 3-ply fringe for its balance, which I did on the first side, what ended up happening was that the side that was divided in two in order to create the three sections had an obvious 2 sections in the area nearest the scarf which creates the little triangle.  I decided to slap my OCD thoughts aside on the second edge and try two ply fringes, which made the little triangular sections nearest the scarf edge much nicer.  I know now that I need to spend more time in the planning for how the fringes are going to be worked, including the size of the hemstitched bout that I need as well as the requirements of each fringe in order to have it come out just as I like.


And now I realize that in wrestling with the photos and captions, I became frustrated and just stopped before finishing...which is what I do....

...but in closing, this is 'our scarf', as Ellen and I have referred to it for the past 6 months.  It took 6 months to finally finish (mostly because I detest shopping. so would have long stretches inbetween when my needle supply was exhausted)....and many hours of joy.  I thank you, Ellen, for your great vision and ongoing encouragement!!

Until next time.......